Hironobu Murakami
m.ripple designer

Pen case with chalking

 チョーキング付きペンケース

Introduction.

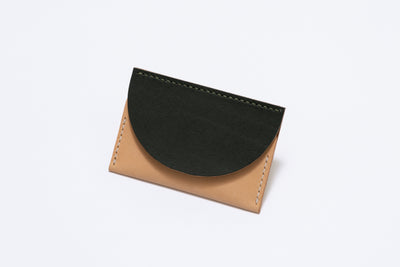
A single piece of leather is used to create a "three-dimensional structure".

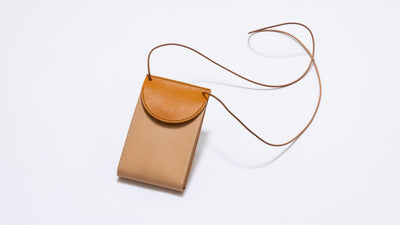
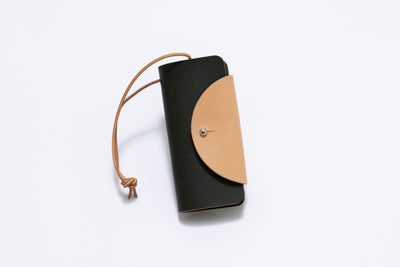
This pen case has a chocking that can be wrapped around the lid to close it. When you open it up inside, you will see that the bottom part has a gusset and is also well prepared, and it has plenty of storage capacity for easy use. It is an item that is easy to use and has plenty of storage capacity.

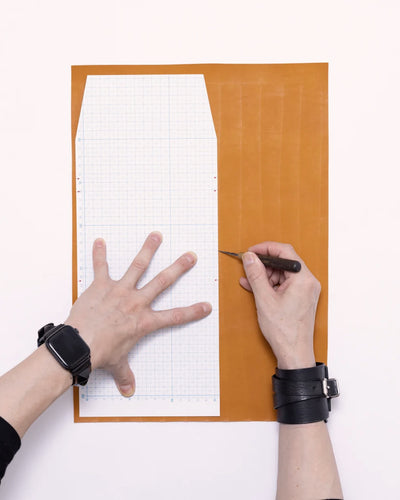
In this recipe, you will learn how to sew the sides and the gusset of the storage space using a single piece of leather. You will also learn how to prepare and tie the laceused for the chalking part, a technique that does not often appear in other items.

Recipes

Pen case with chalkingの作り方

Download pattern paper [A3 size].

Please print on A3 paper without scaling.


STEP.1

Put the pattern on the leather and "eye strike" it.traceI will do so.

STEP.3

The cut parts are "toco-processed".

STEP.4

of the cut parts.Koba polish."to the "I" in the following paragraphs.

STEP.5

The part or parts to be pasted togetherApply "Cybinol" 2 mm wide.Yes.

STEP.6

When "Cybinol" is slightly dry, attach the parts together.

STEP.7

Draw a 3 mm wide line with a "divider" on the area to be sewn.

STEP.8

Mark the lines with a "divider" at 4.5 mm intervals.

STEP.9

Use a "rhizogiri" on the marked area.Make a hole.We are going to do it.

STEP.10

Cut the "Rowbiki thread" used for sewing in the required length. Cut about 4 times the length of the entire part to be sewn plus 10 cm.

STEP.11

Rowbiki threads at both ends."Hand sewing needle."on.

STEP.12

A needle is threaded through a hole made by "Hishigiri".sewingThe following is a summary of the results of the project.

STEP.13

The end of the stitch is"Nigomegatari."to the

STEP.14

Cut the thread with scissors, leaving about 3 mm of thread

STEP.15

Burn it with a lighter.thread guard (e.g. in a spinning machine)The following is a list of the most common types of products that can be used.

STEP.16

Open the bottom of the pen case, apply "Cybinol" and paste it together.

<Point Advice>
This pen case craft has the theme of "creating a three-dimensional gusset using one-piece parts," so be aware of the "vertical and horizontal three-dimensional structure" that will provide space for things to fit.

STEP.17

Mark at 4.5 mm intervals with the "divider."

STEP.18

Holes are drilled using a "Hishigiri" in the marked areas.

STEP.19

A needle is threaded through the hole made by "Hishigiri" and sewn.

STEP.20

The outside of the pen case will be polished and finished.

STEP.21

To create the lace that holds the pen case in place, a 4 mm wide line is drawn with the "divider".

STEP.22

Cut the lace with a "leather knife.

STEP.23

Cut off the edge of the lace you made diagonally with a "leather knife".

STEP.24

Punch a hole in the lid of the pen case with a "dove knife".

STEP.25

Thread the lace through the hole you made. Make a loop through the hole and tie the lace twice tightly around the loop.

STEP.26

Fasten the lid of the pen case with the tied lace and you are done.


Download pattern paper [A3 size].

Please print on A3 paper without scaling.

Author Profile

Hironobu Murakami

With 25 years of leather craft experience, she became fascinated with leather craft in 1997 when she made her own personal items for riding her motorcycle. She specializes in crafting bags, wallets, and accessories, and after working for a manufacturer, she has been active in the leather brand "m.ripple" since 2012. She has a store and studio, an e-commerce site, a pop-up store in a department store, and many exhibitions, and is also in charge of collaborations with companies.

Click here to see m.ripple's product list